
Using the Manage View
The Manage view is made for staff on a phone, tablet or computer. Open it from the profile menu, or add ?mode=manage to the end of the app address.
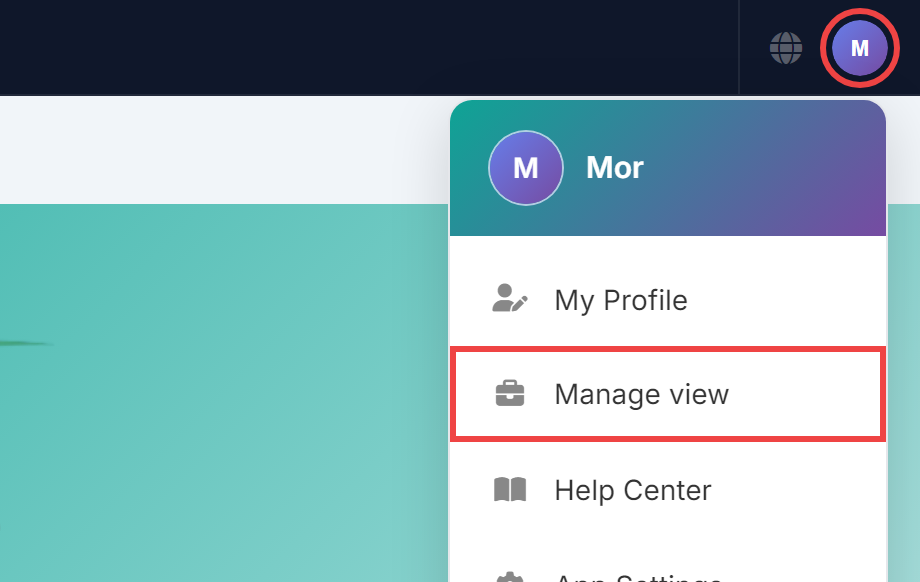
Tap your picture at the top right and choose Manage view.
Who sees it
Admins see all daily work, all modules and all settings. Other roles see only what you ticked in Users → Roles → Permissions. Regular users never see it.
Moving around
- The home screen is a menu. Each item opens as its own screen with a back arrow. The back button and a swipe from the left edge go back.
- The search box on the home screen looks inside your data: classes, students, customers, subscriptions, income and payment requests. You only get results your role may open.
- Tap the logo or the app name to refresh. On a phone, pull down at the top of any screen to reload it.
- Tap your initial at the top right and choose Dark screen or Bright screen. The choice is remembered on that device.
The round buttons on a phone
- The round + does the main add action of the screen, for example Add Page or Add Income.
- The round menu button lists only the sections of that screen. The screen goes darker while it is open, tap outside to close it.
- Forms open as popups with a round X in the corner. Tapping the dark background closes them.
Lists and documents
- Action buttons look the same everywhere: soft rounded icon buttons. Approve and Confirm are green, Delete and Cancel are red.
- Tapping Invoice or Receipt opens it full screen. Pinch or double-tap to zoom, and use Download at the top.
- In Customers the search filters as you type.
- Pages: hold the handle on the left and drag to change the order. A popup asks you to confirm before it is saved.
Forms
The Forms screen (admins only) lists all forms of the app: the Signup form, Game votes and every other form. Tap a form to see its answers or open it for editing.
Customers and family members
- Open a customer to see subscriptions, history and family members. Tap the pencil to edit a family member or child.
- The bin button next to a family member removes the person from the family list. Their history, such as subscriptions and attendance, stays.
- The Device section shows the phone of the customer and can reset it, so it registers again the next time it is used.
Was this article helpful?